Showing posts with label The Art Of. Show all posts

12.23.2011

The Art of Hospital Corners

Ever heard the saying "it's the little things in life"? Well that is very true for me. Getting all greens on the way to work, making the perfect cup of coffee, 70-degree blue skies, etc. I get a lot of joy out of the details. One of the things I love is a freshly made bed. I always sleep so much better when the sheets are perfect.

Although that previous paragraph is entirely true and sounds extra Martha Stewart-ish .. please don't get me wrong. I never get all greens. I tend to drink slightly-less-than-perfect coffee. I'm always stuck in my cubicle on those 70-degree days. And my bed?

I'm going to be really honest with you:  I have always been taught you should wash your sheets once a week. Yeah, this doesn't happen. I'm lucky I get all of our laundry done and put away once a week .. and there is only two of us! I just DO NOT like laundry. I will wash it all day long but I hate putting it away. So seeing as clothes are far more important than sheets, I always save the sheets for last.  If I have the energy and that time .. they get washed.  If I don't .. they don't.  With that being said .. I average 1-2 times per month.  I'm sorry if that grosses some of you out.  We shower regularly and work desk jobs.  I just don't feel like it's all that bad.

Seeing as how I just admitted to you how non-Martha-ish I am, I'm going to let you in on one of my little secrets.  Sometimes if you just take the extra time to do something really well and thoroughly .. the results last a lot longer and you have to do it less often.  I will gladly spend an extra 3-5 minutes on the following task if it gives me an extra week or two of laziness.  The task I am referring to is making the bed.

The trigger for "omg I need to change these sheets NOW" is when they just start to get all rumpled and out of sorts.  I "make the bed" every day but straightening the sheets is far different from remaking it from scratch (which you obviously only do when you replace the linens.)  I've learned that if I do really well the first time then the non-rumpled feeling lasts longer.  So if you are even slightly like me and want to know how to keep a bed fresh-feeling longer.  Here's is a how-to guide on the art of hospital corners:


1. Spread the flat sheet out on the mattress that already has the fitted sheet on the bottom and center it. Place the top end of the sheet about 1 inch from the edge of the mattress at the head of the bed.

2. At the foot of the bed, lift the mattress and pull the top sheet snugly under the mattress. Do this at both sides of the bed so that the top sheet is firmly tucked under the mattress.

3. "Eyeball" a line from the corner of the mattress to the side edge of the sheet that is hanging down. This imaginary line should be at about a 45 degree angle.
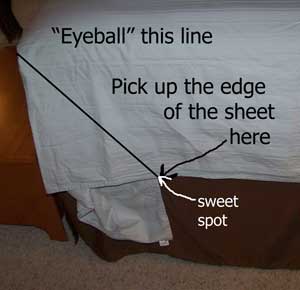

4. . Using this imaginary line pick up the edge of the sheet at the "sweet spot". This will be the only spot where you pick up the sheet from now on.


5. Fold the sheet back over the mattress. It helps if you put your free hand on the edge of the mattress and fold the sheet over it.


6. Tuck in the sheet on the side of the bed that is hanging below the mattress. It should look like a little triangle and that is what gets tucked under the mattress.


7. Pick up the edge of the sheet again, right on the "sweet spot". Put your free hand on the side of the mattress this time. Bring the sheet down over your hand.


8. And there you go!  A perfectly made bed that will hopefully buy you some extra laziness.  Just throw your duvet or comforter on top and you're done.  Once you do this a time or two it honestly doesn't take long at all; an extra 3-5 minutes max.


Do you make your bed this way?  Do you wash your sheets weekly? More? Less?  Am I totally gross because I only change them once or twice a month? (Don't answer that last one ;) )

12.13.2011

The Art of Tying a Perfect Bow

Knowing how to tie a perfect bow can come in handy sometimes. Whether you are wrapping a gift, making a craft, tying a dress or putting a ribbon in your child's hair .. there are many ways to show off your newly learned skill. Below are three bows that I learned to tie via Ms. Stewart:

The Favorite Bow
Perfectly suited for wire-edge or stiff ribbons that hold their shape. You'll need at least twelve inches of ribbon just for the bow. If wrapping a box, first tie a left-over-right half-knot.

Bow How-To:1. Shape two evenly sized loops, one in each side of the ribbon.
2. Cross right loop over left one.
3. Knot loops by threading right loop behind left one, under, and up through the hole; make sure ribbon is not twisted or bunched.
4. Pull loops into a smooth knot. Adjust loops; trim tails to be slightly longer than loops.


The Double Bow

To make a perfect double bow, leave enough tail on both ends of the first bow to make the second one. An extra set of hands is also helpful to ensure that loops are taut. First, follow directions for the favorite bow, leaving an even tail on both sides; don't finish ends.

Bow How-To:

1. Position bow horizontally, and determine which tail exits the knot on the top, and which exits underneath. Make a loop in each tail.
2. Cross top loop over bottom one.
3. Knot by threading top loop behind bottom one, under, and up through the hole; make sure ribbon is not twisted or bunched.
4. Pull loops to tighten; make sure knot of second bow overlaps knot of first. Trim tails, and arrange loops.


The Winged Bow
This classic treatment is simple and not frilly.  You'll need twelve to fourteen inches of ribbon to work with after encircling the object; use a right-over-left half-knot to secure the object.

Bow How-To:

1. Cross left tail over right one.
2. Knot ribbon by threading left tail behind right one, under, and up through the hole; make sure ribbon is not twisted or bunched.
3. Pull evenly on tails until ribbon has tightened into a clean, smooth knot.
4. Arrange folds, and trim ends of ribbon.


Happy Bow Making!

12.09.2011

The Art of Wrapping a Gift

This officially marks the second new "series" of posts that I have started this month.  The first new addition was my midweek confessions series; a weekly confessional where I divulge my imperfectness.  This second series I will call my The Art Of series; a photo tutorial on things that can make your life easier and more organized.  Sometimes it's simply in the minutiae.

Anyways .. back to the tutorial...

Since it is the holiday season, I thought a gift wrapping theme would be appropriate.  By no means am I insinuating that you don't know how to wrap a gift .. I just thought it would be fun to show you how I do it.

Step One:  Go ahead and gather all the materials you will need so you have them at arms reach.  The items I used are: Gift, wrapping paper, tape, scissors, ribbon, paper and markers.

paper and markers not pictured. oops.

Step Two:  Unroll your wrapping paper and, using your gift as a guide, cut out a generous piece of paper that easily wraps around all sides of the gift.

I like to pick the smallest sides as the "ends" which will be where you fold everything.

Step Three:  Fold one side up and place it in the middle of the top.  I like to place a tiny piece of tape here just to keep everything snug.


Step Four:  Bring the other side of the paper up to meet in the middle.  Fold the paper edge over so the seam looks clean and neat.


Step Five:  Find the two opposite sides that don't contain the main seam.  Push one side down and neatly crease all the edges.  Do the same for the other side.  *Note:  I went ahead and did one side so I could show pictures on the table top.  Placing the gift between your knees will allow you better handling when doing the first side.


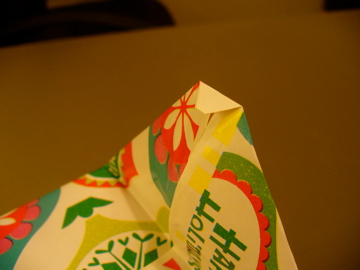
Step Six:  Take the flap that contains the seam and fold it up towards the middle.  Take the top flap, and after folding down the tip to make it neat, fold it over the lower flap.  Place a piece of tape on top to secure it in position.


Step Seven:  Depending on your choice of "finishing touches" the following steps will vary.  I did a simple ribbon in order to demonstrate a square knot.  *Note:  After starting I realized I didn't have enough spare ribbon.  Normally I would have done a bow but I just didn't have enough to allow for that.  Sorry.

The basics of a square knot are this:  whatever side you overlap first, overlap the other end next.  (i.e. left over right then right over left).  This allows the knot to pull on itself and it won't untie.  It will also never get too tight where you can't untie it.

left over right

a more complete "left over right"

right over left

Step Eight:  I like to use real ribbon.  It makes the whole gift presentation look a little nicer.  You can find nice ribbon on sale almost anywhere.  Just try not to use busy paper and busy ribbon.  If you use real ribbon then this would be the time to tie a bow.  You can use any bow you like.  If you use gift curling ribbon then this would be the time to take your scissors and curl it.  You get the point.  Since I ran out of ribbon then I won't worry about showing you a picture of the bare knot. :)

Step Nine: Identifying who the gift belongs to.  This is another outlet for you to be creative.  If you have kids then this would be a great project for them to do.  You can buy a ton of different tags in the store but if you want to make it look more personal then you can certainly make your own.  I spent only a couple minutes throwing this one together (and it looks like it ..haha) but you get the idea.  I simply cut out a shape similar to those on the package and colored it accordingly.  Use your imagination and have fun!


Merry Gift Wrapping!

12.03.2011

The Art of Folding a Fitted Sheet

Isn't it nice when you open the package of new sheets and everything is so neatly folded?  Isn't it awful after you wash them that they never seem to be that way again?  Well here is my little tutorial on how to fold a fitted sheet.

No, you don't have to wad it up in a ball of frustration anymore! Promise :)


Step One:  Take a corner of the sheet (ex: top right) and place it over one hand.


 Step Two:  Take the other corner (ex: top left) and place it over the first corner.


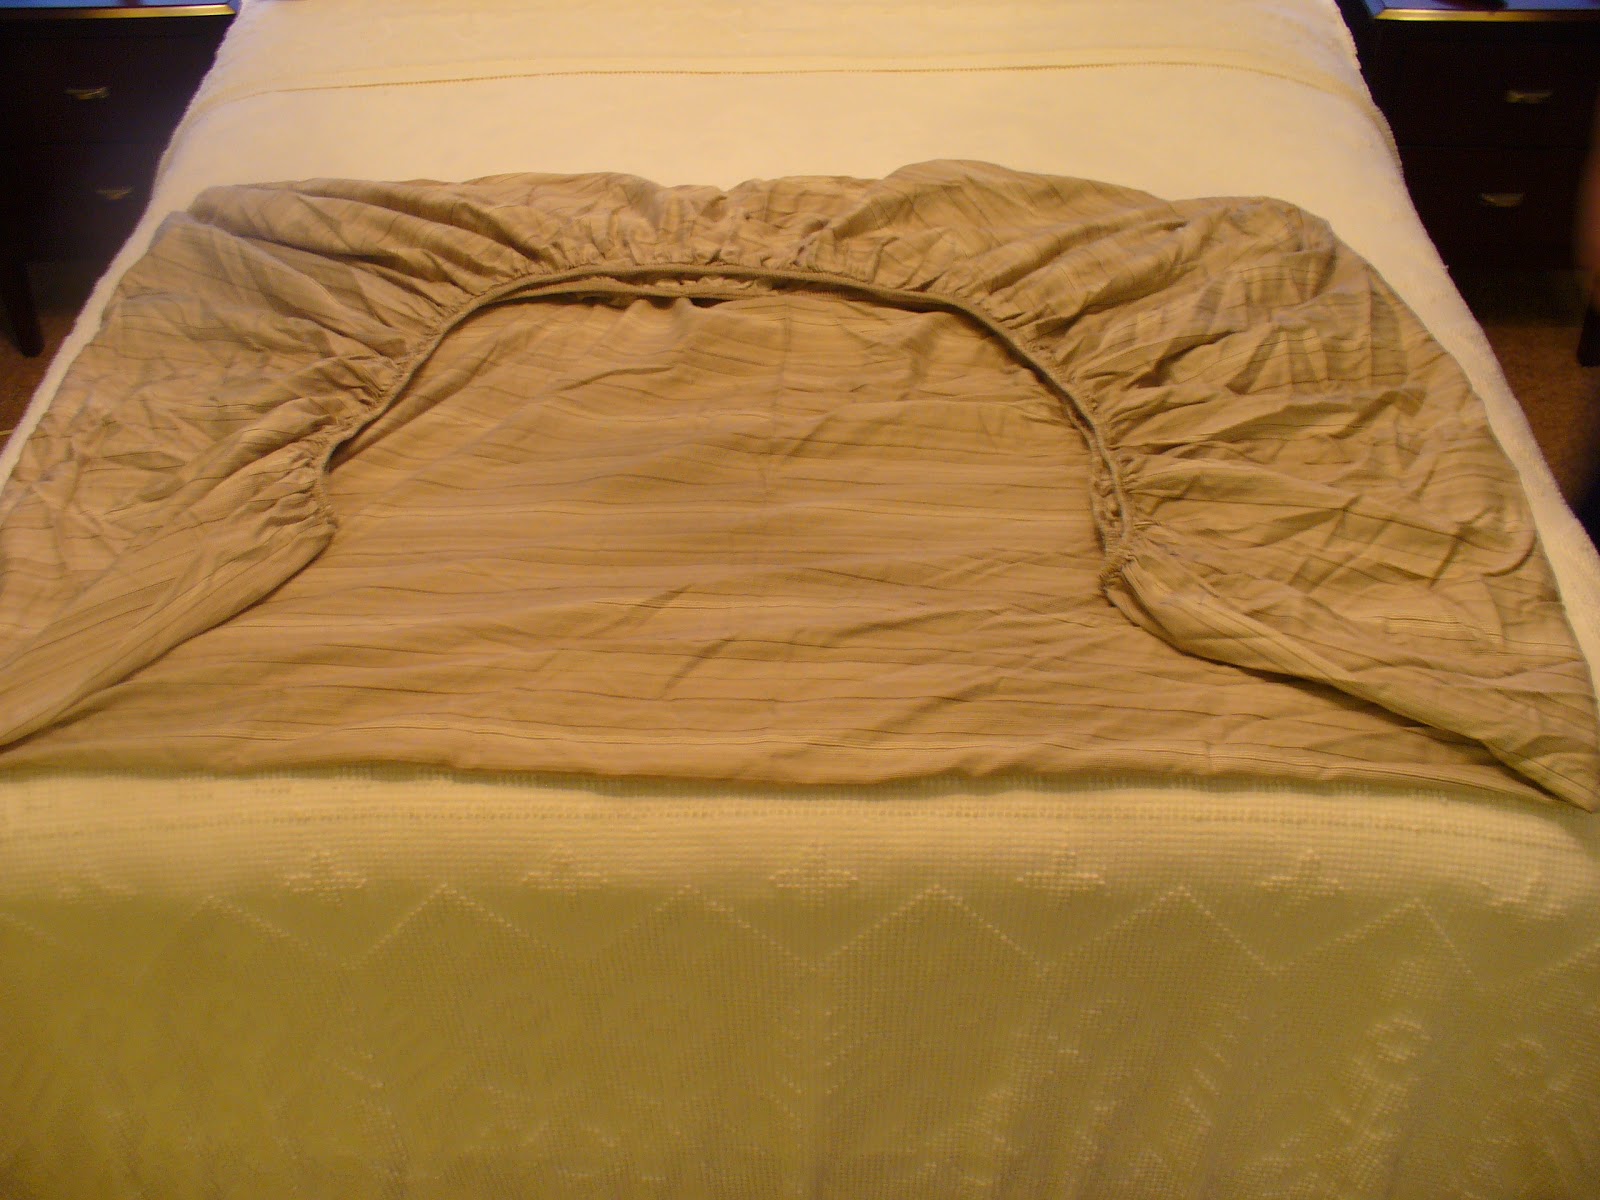
Step Three:  Repeat on the other side.  Eventually you can do the whole thing standing up but laying it out at first will help.  Once you have both corners inside the other, it should lay flat like this.  Just adjust the sheet until you have a rectangle.


Step Four:  Fold it in half.


Step Five:  Fold it in half again.


Step Six:  Fold it in thirds.


Voila!  You have neatly folded a fitted sheet!  If you want to take the organization a step further then you can do what I do.


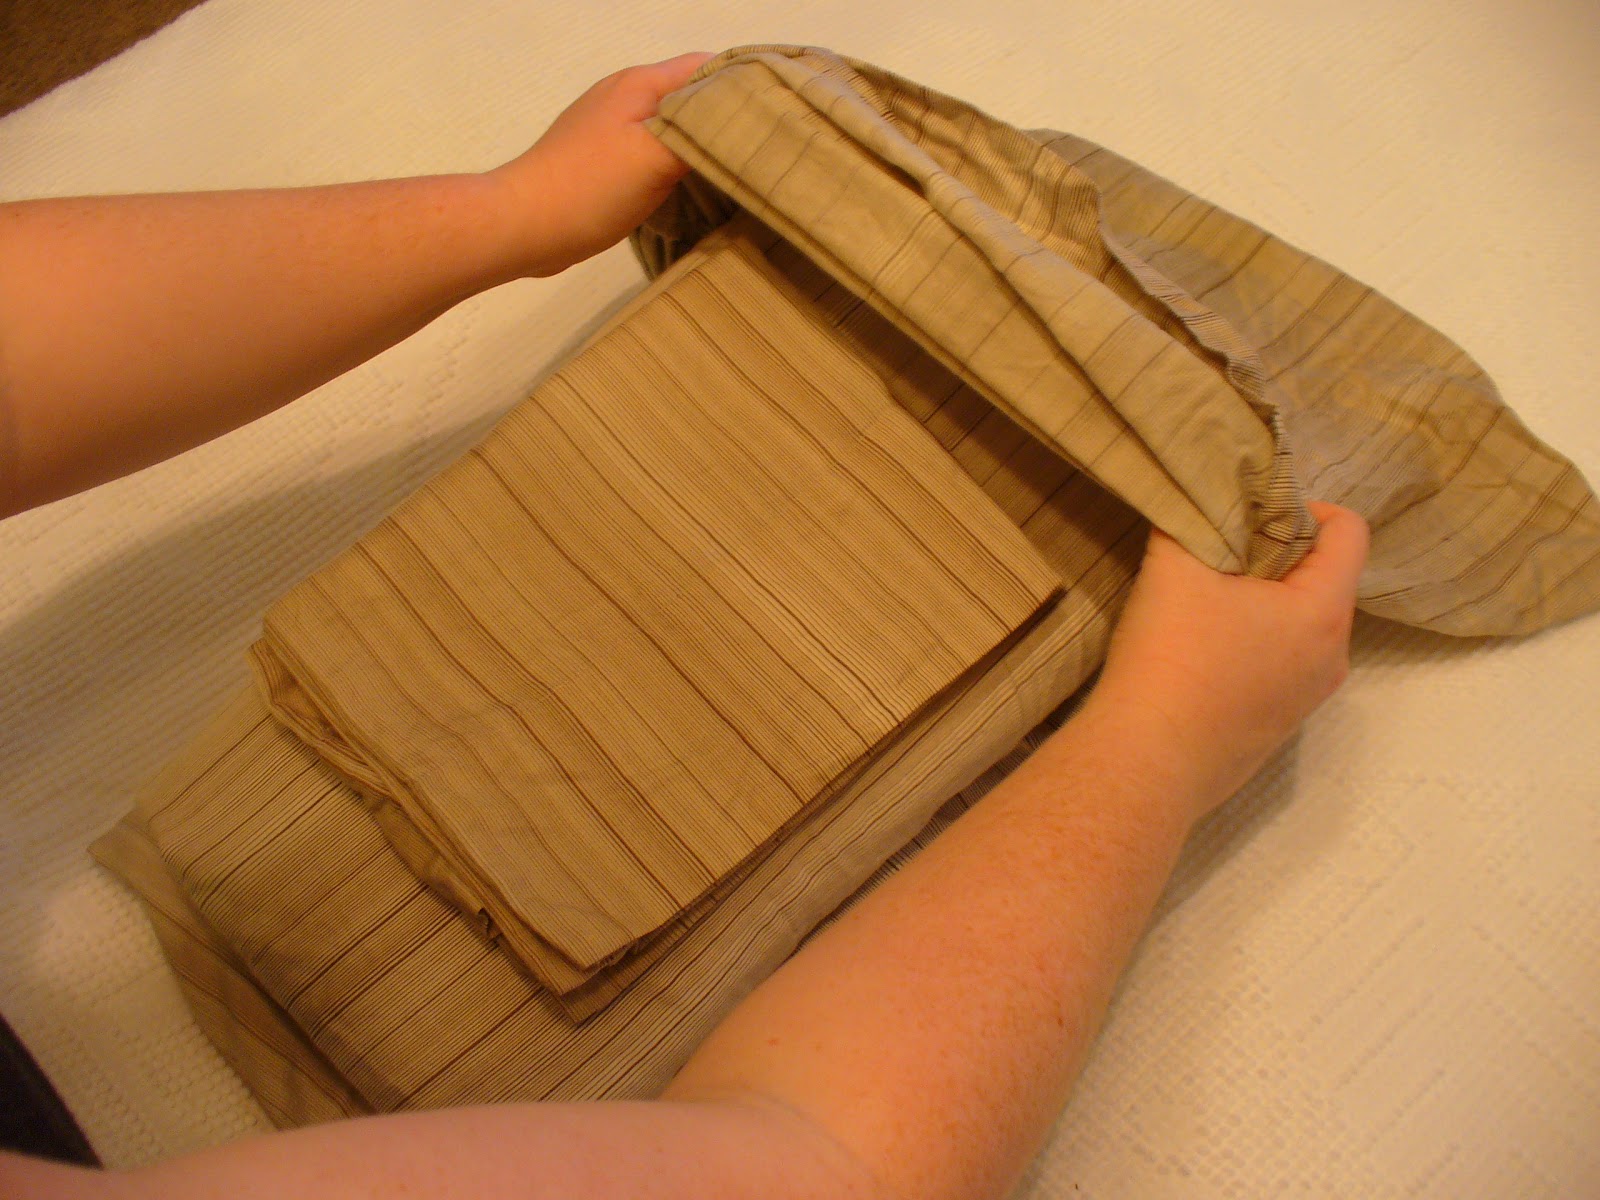
Step Seven:  Fold the flat sheet so it is about the same size and the fitted one.  Place all but one matching pillow case on top.


Step Eight:  Take the remaining pillow case and slip it over the stack of sheets.


There you go!  You have a "bed in a bag" ready when you are.  No more searching for all the matching sheets!

Now here is a sneak peek inside my bathroom closet.  

Top shelf (not pictured):  Extra toilet paper
Second shelf:  First aid kit, water for Netti Pot and a wicker basket that equals our medicine cabinet.
Third Shelf:  Bath towels on left and beach towels on right.
Fourth Shelf:  Sheets sets on left.  Miscellaneous pillow cases and an extra fitted sheet that don't "go" with anything else in the middle.  Hand towels and wash cloths on the right.
Below the shelves:  Our laundry basket.


Do you fold sheets this way?  Do you have suggestions for alternative ways to organize a linen closet?

9.20.2011

Please Bow to Your Inner Cleaning Sensei


If you've never been to bluntcard.com .. now's the time .. h-i-l-a-r-i-o-u-s!

It's that time of the year!  Time for Spring Fall Cleaning!  You may be scratching you heads and going "Um, Jess, you are a little confused.  It's totally the wrong time of year.  That's why it's called Spring cleaning .. you do it in the Spring!".  Well yes and no.  Yes, you do a major clean-athon in the springtime but it's important to do it right before winter, too. Hence my "Fall Cleaning" post.

Now, I could totally write something and try to be witty and motivational but why reinvent the wheel?  My friends over at ApartmentTherapy have already compiled the perfect list and broken it down for each of us.  Happy cleaning!

~~~~~~~~~~~~~~~~~~~~~~~~~~~~

Apartment Therapy believes that cleaning, like karate, has different levels of mastery. There are those who can drop-kick a closet full of dust bunnies in seconds, and those (like us) who aren't the sloppiest kid in the class, but fall way behind the black belts. Whether you're a beginner or a master, we've provided a fall cleaning checklist that will match your skill level.


- White Belt: It's not exactly a seasonal checklist, but FlyLady's Crisis Cleaning Guide breaks up the art of the binge clean into 15-minute intervals. Baby steps.

- Yellow Belt: You probably thought Martha Stewart's seasonal cleaning checklist would require the skills of a brown or black belt, but it's a surprisingly simple guide with only one or two feats of strength. (We'd personally skip the suggestion to wipe down the ceiling.)

- Orange Belt: TLC Home's fall cleaning guide is broken up into 5 major categories. You'll feel the burn with tasks like cleaning the furnace and deep-cleaning the carpets.

- Blue Belt: The fall cleaning guide from How Stuff Works has a long list of indoor and outdoor tasks, ranging from wiping down light fixtures to cleaning the gutters.

- Green Belt: Zabitatz includes a lot of the same suggestions as the other checklists mentioned, but steps it up a notch with instructions to clean the grill, chimney, refrigerator coils, and storm window screens.

- Purple Belt: In comparison to the rest of the bunch, Real Simple's fall cleaning checklist is surprisingly complex, with tips to touch up exterior house paint, declutter the attic, and caulk around doors and windows.

- Brown Belt: Not for the novice cleaner, Organized Home provides a detailed checklist that covers everything from stocking up on sidewalk salt to draining sediment from hot water heaters.

- Black Belt: The Home Know-It-All provides a list that's deceptively short. They expect some serious cleaning skills from their readers, with tasks that include cleaning out the garage, inspecting the chimney, and checking the roof shingles.

8.31.2011

Thinking Outside the Box


One of my favorite organizing tricks is not using something for its intended purpose.  This originally stemmed from a lack of funds but soon turned into a creative outlet.  What do I mean?  Well, as you know, I am a huge fan of "a place for everything and everything in its place".  I love the idea of having a specific home for everything.  With that being said, I ran into a problem with my jewelry.

During college I worked in a trendy boutique that mainly sold jewelry.  I had a love of earrings and such beforehand but that job took it to a whole new level.  Over the years I have purged and purchased ... lost and found … broken and fixed many different pieces.  I finally came to the conclusion that there had to be a simpler way of keeping track of everything.

The first thing I did was take care of my necklaces.  I don’t know how much time I spent untangling chains but it was too much.  They sell plenty of fancy little wire sculptures to hang necklaces on but I was never satisfied with them.  They always seemed too flimsy or too small to meet my needs.  I ended up finding the perfect solution in key ring wall hooks.

There are several options out there so I am sure you can find a style you enjoy.  What makes them so perfect is that they are made to hold keys so they are sturdy and capable of holding a large quantity of items.  It works like a charm for keeping chunky beaded necklaces and fine chain necklaces from becoming permanently attached.

The next quest was to find a solution for my dangly earrings.  I went to a salvage store and bought a large picture frame for $1.00.  I then went to World Market and bought (on clearance) a loosely woven place mat that coordinated well with the frame.  I staple-gunned the place mat to the inside of the frame where the glass would have been.  I mounted it on the wall and it worked great!  I am now able to easily hang all of my earrings in pairs and effortlessly see, at a glance, what I have and what I don't.

The final aspect was bracelets and stud earrings.  I have an old wooden box on my dresser where I keep the rest of my jewelry.  Personally, I don't have many bracelets so those weren't really an issue (I just keep them in a stack) but the stud earrings were.  They roll around everywhere and are smaller and easier to lose track of.  The perfect solution for me was a daily pill organizer.  It keeps all the studs separated and easy to keep track of.  It's also great for traveling!

Some times it will be hit or miss.  Just experiment and see what you can come up with.  None of the items I used were for their intended purpose and yet they worked flawlessly.  You never know how creative you can be until you try.

8.19.2011

Creative Cord Solution!

I just received an e-mail forward that had a lot of funny pictures in it.  One of them I thought was brilliant, though!  If you happen to have a cord (iPod, for instance) or two at your desk that isn't always plugged in and tends to fall behind the desk.  Here's your solution:


All you have to do is clip these in an inconspicuous area of the desk and voilàI love creative solutions :)
Related Posts Plugin for WordPress, Blogger...